HOW TO SET UP AND PACK UP PCOR AWNING
HOW TO SET UP PCOR AWNING
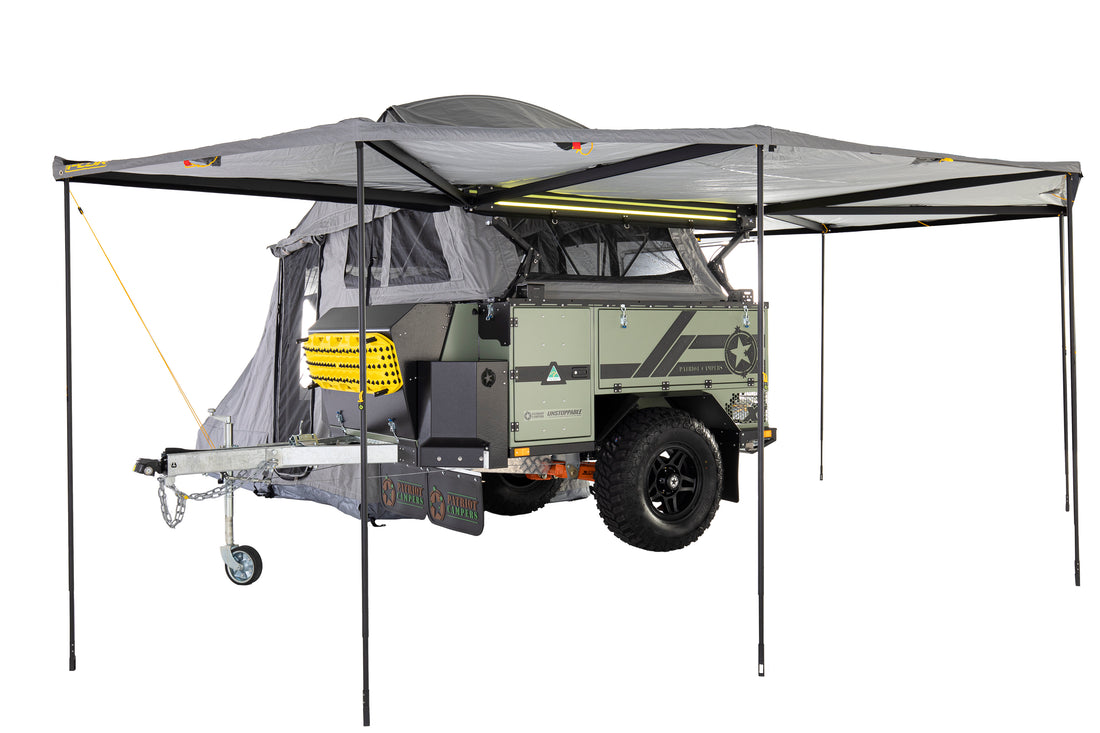
We suggest starting at the rear of your camper trailer. To release the hatch on the scissor lift, push it up gently and secure the support bracket. Repeat at the front of the camper. When your scissor lift is up, you can unzip and remove the bag. Make sure you flip the bag up and out of the way. Then you can easily undo the Velcro straps around the awning and let the awning hang down naturally.
Always open the awning first towards the rear, before you open it up to the front of your camper trailer. That way nothing gets twisted up inside. Loosen the strap on the front, to help yourself with the pack up. Support the awning at the bottom and walk around to the back of the camper. Let go of the legs as you walk around, but don’t place them down yet. As you arrive at the far side (closest to the driver’s side of the camper trailer), drop the leg, and ensure that the tyre swing is out. That way, you can place the leg pole into the outside of the tyre swing frame. You can now pull out all the leg poles. These poles are all twist lock, which means that you must twist anti-clockwise to release and clockwise to lock them in place if you want to adjust their height.
Now you can undo the other awning strap at the right side / the passenger side. Bring that part of the awning out towards the front of the camper trailer using the same technique. Let go of the frame as it comes to full length. You then grab the guy rope at the front of the camper trailer that hangs from your awning. Peg down your guy rope towards the driver’s side of the camper trailer, to minimise accidents. Go under the awning and pull out the leg poles. Then place your spreader pole into the allocated holes in the middle awning section. Peg down all your guy ropes and you are now all set!
If you get some water pooling, simply lower one of the legs to divert the water off the awning. Just be careful to not put too much pressure on the hinges close to the scissor lift.
The wall kit, if you have it, comes with 6 awning walls. One of them (on the side where you have placed the spreader pole) is considered and used as a door.
Enjoy your camping adventure and read on if you want to learn how to pack up the awning at the end of your trip.
HOW TO PACK UP PCOR AWNING
Packing up your PCOR awning is basically doing your set-up in reverse. First unpeg all your guy ropes and tie them up nicely, except the one at the front.
You always start packing up the awning at the front first. Bring the leg pole inward, towards the camper trailer, and then twist it anti-clockwise to unlock, shorten it, and twist clockwise to lock the pole into place. Push it gently into its assigned channel and do the same for the other poles. Undo the guy rope at the front, but you can leave that one hanging. Now take the front of the awning and walk the awning in towards the rear of the Patriot Camper Trailer. When you cross the other side of the awning, ensure that you go under it. You place the front half of the awning into the loose strap and tighten it.
Now collapse the remaining legs into their channels, working from front to rear. When you arrive at the last pole (that is supported by the wheel swing), support the frame with one hand and use your other hand to guide the leg pole out of the frame. Bring it around the wheel and place it in its allocated channel. Keep supporting the beam while walking the awning in from rear to front. Flick over the Velcro straps at the top of your awning system. Place the awning into the loose strap and tighten securely.
You will see that both parts of the awning have left a triangle of canvas hanging. Start rolling the canvas by choosing one point of a triangle towards the top of the trailer and gather the other triangle point as you go. Or, if you are lucky enough to pack up with a partner, both grab a point of the canvas and roll it up simultaneously. Ensure to not trap the Velcro straps during this step. Now, take the middle Velcro trap. Place it over the canvas, feed it through the key ring (which is located under the canvas you just rolled up), and secure it over the awning. Repeat with the other two straps.
You still have the guy rope from the front of the awning hanging on the side. As you will now see, it is easy to loosely roll up and place inside the awning canvas. That way, it is ready to go for your next camping adventure!
Flip the bag over the awning and zip it up. Use one hand to pull the zip and the other hand to guide it along. Just to make sure that nothing is getting caught in the zip. Last thing to do is lowering the scissor lift. We always start at the rear. Place one hand under the top beam, to release some of the pressure on the support arm. Release the support arm and lower the awning. Bring the compressor latch up, but don’t secure it yet. Repeat at the front. Latch the front compressor latch securely and do the same with the one at the rear of the camper trailer. Just check that your latch is sitting nicely in the middle, so that the weight of the awning is distributed evenly.


